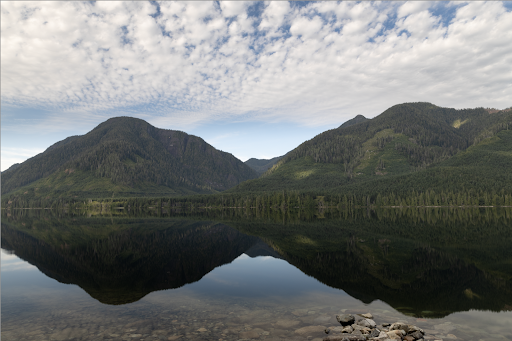
We’ve all taken a photo where the sky just looks a bit too flat, washed out, and completely mediocre compared to how it looked in real life. Especially when capturing golden hour photos and landscape images, capturing skies that look as vivid and dramatic as you imagine is key to enhancing your photos. Luckily there are 3 incredibly simple tricks to help enhance any sky in your images using Adobe Lightroom.
With the three tricks outlined below, you’ll discover how to enhance gloomy clouds, blue skies, or dramatic sunsets with ease, even if you’re a complete beginner!
Option 1: Selective Adjustments
The best way to enhance a sky in Lightroom is using selective adjustments. In Lightroom, you can selectively apply your adjustments with the Gradient Filter, Radial Filter, or the Adjustment Brush. In the latest update of the program, you can also use AI to select the sky automatically with a click.
Since skies are typically only visible in the top portion of your image, the Gradient Filter is the ideal option for creating seamless adjustments isolated to the sky. However, intersecting a Gradient Filter with the AI sky selection offers the best results. Here’s how it’s done.
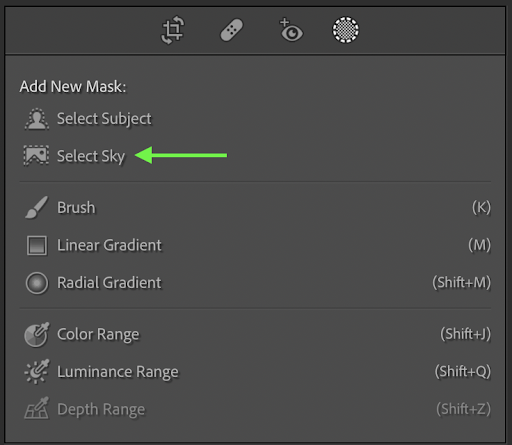
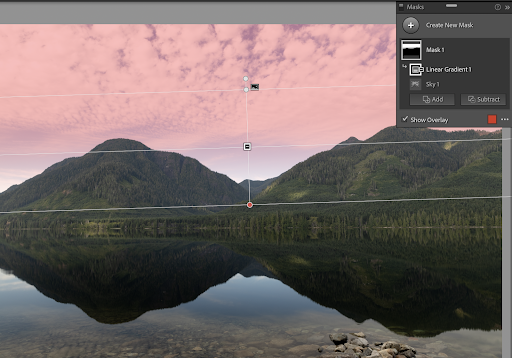
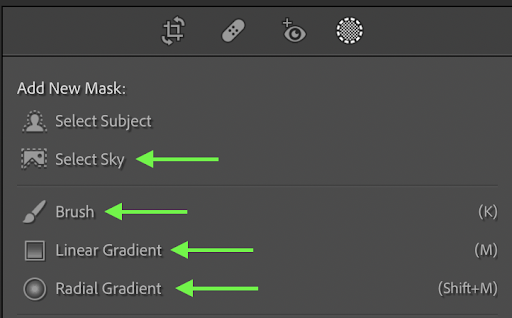
First, open your image within the Develop Module of Lightroom. Then click on the Masking icon found above the Basic panel.
![]()
Now choose Select Sky from the options that appear.
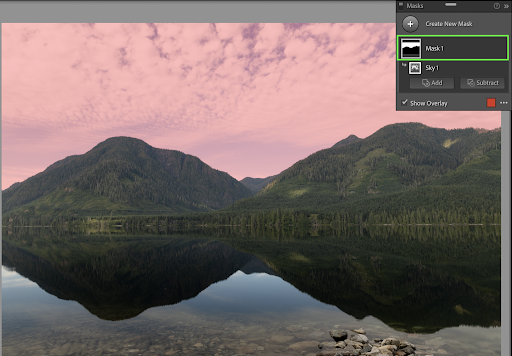
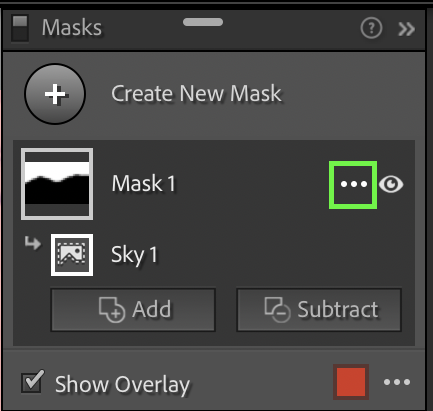
Once the Select Sky mask is created, it’s time to intersect this selection with a linear gradient for a more natural result that matches the look of a real-life gradient ND filter. Clicking on the ellipse icon, choose Intersect Mask With > Linear Gradient.
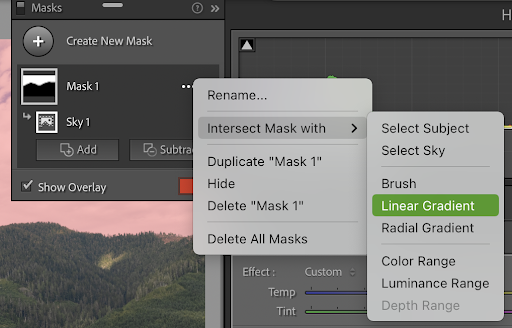
With the Linear Gradient selected, click and drag down from the top of your image to create a new gradient adjustment. The goal here is to create a gradient that covers your sky, while ending near the horizon. Since it’s intersecting the previous sky selection, the gradient will be restricted to the sky.
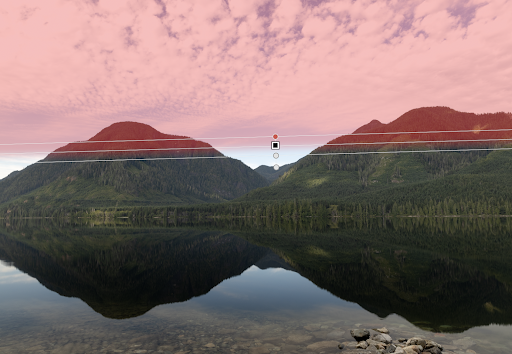
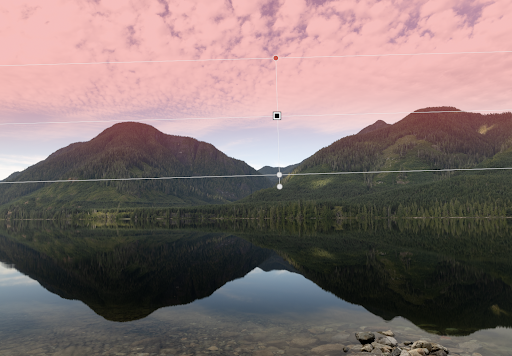
The further apart the start and end of your gradient are, the softer or harder of an edge the adjustment will have. If you have an image with mountains or other uneven horizon lines, having a softer gradient will create a more blended result. Meanwhile, if you have a clear horizon line such as with photos looking out at the ocean, a harder gradient would be a better option.
Luckily the red highlight that appears makes it easy to see exactly how hard your gradient adjustment is. Anything covered by this red highlight will be affected by the adjustments you will create. Below is an example of a hard-edged gradient compared to a soft gradient.
– Best Adjustments To Add With The Gradient Filter
With the gradient in the correct position over your sky, it’s time to make some adjustments. Looking at the adjustments panel, any adjustments you add will only affect the selected area from the gradient filter. Although you can adjust anything you’d like, there are a few adjustments that work wonders for enhancing your sky.
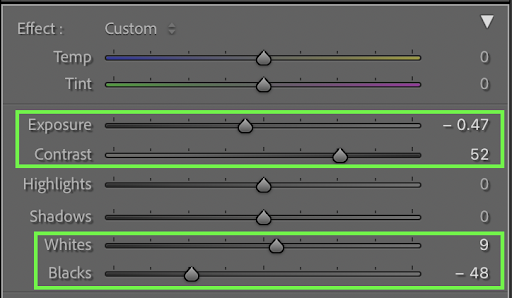
The first adjustments are the exposure and contrast sliders. Any time your image looks washed out or lacks detail, it’s common that the sky is slightly too bright. By bringing down the exposure slider, you darken down the entire sky to reveal more details.
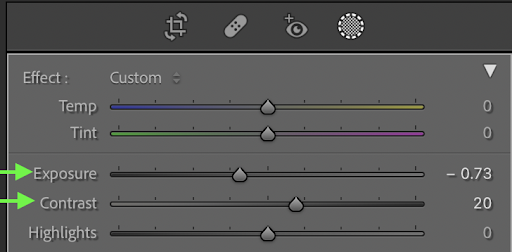 After darkening the sky, boosting the contrast slider helps to make the clouds pop by increasing the intensity of the highlights and shadows.

The next options are the whites and blacks sliders. Rather than the highlights and shadows, the blacks and whites sliders work better to deepen the contrast in the sky. To darken down any shadows in the sky, such as clouds on a stormy day, reducing the blacks slider helps bring them to life.
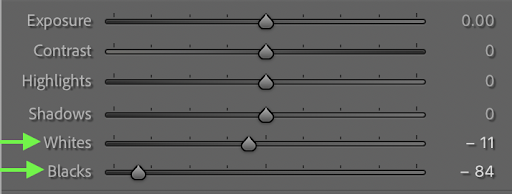
With the help of the whites slider, it can be reduced to reveal more details in the sky, or increased to give it a more dramatic appearance.
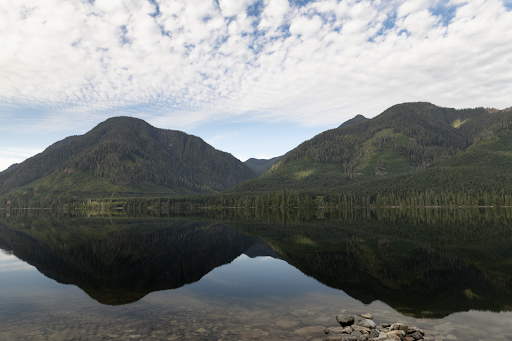
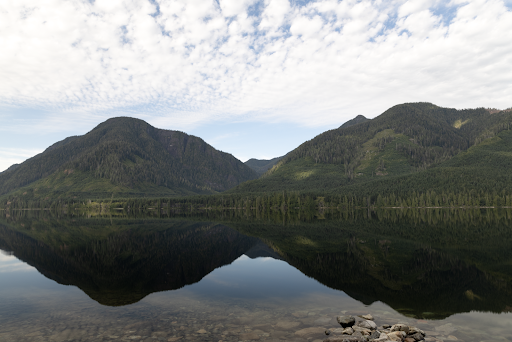
With these four sliders in mind, you can also use all four together to create a more refined look to your sky.
Option 2: Luminance Adjustments
If you have a photo taken in the middle of the day, has a clear sky, or you simply don’t want to deal with selective adjustments, the luminance adjustment is the perfect solution.
Found within the HSL adjustment within the Develop Module of Lightroom, the Luminance allows you to target the brightness of individual color channels. For a blue sky or a sunset glow rich with orange and yellows, these sliders let your target those areas without any selective adjustments.
With that said, it’s important to remember that these adjustments will apply to your entire image. So for example, if you have a portrait image where your subject is wearing a blue shirt, and you also want to target the blue sky, the luminance adjustment will affect both areas. This method works best when the colors in your sky are primarily located in your sky, and not in other areas of your image such as skin tones, clothing, or objects.
Now in this example, I want to make the blue sky in my image appear darker to help make the clouds stand out. To start, access the HSL panel and click on the Luminance adjustment.
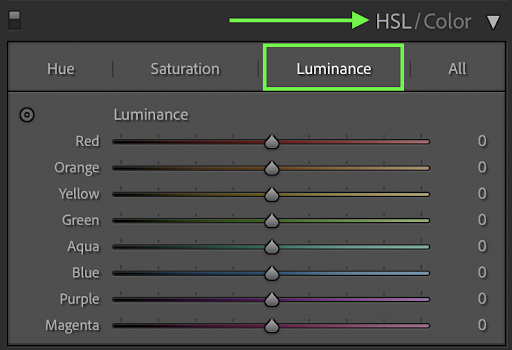
Since the color I want to target is clearly blue, that means I will adjust the blue color range. If your sky was orange or yellow, you would adjust those color ranges instead.
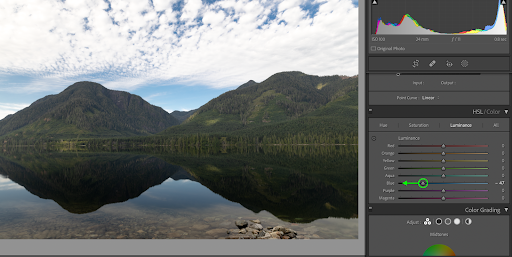
Moving the blue channels luminance slider to the left, the blues in my image begin to get darker. After just a small adjustment, take a look at how the sky has come to life.
The luminance adjustment is a simple yet powerful tool for enhancing skies in Lightroom. Since it targets colors without needing to make selective adjustments, it’s one of the simplest options to use; especially for photos taken at midday.
Option 3: Dehaze & Clarity
The final way to enhance skies in Lightroom is using the Dehaze and Clarity adjustments. The beauty of these adjustments is that they can be used with or without selective adjustment tools based on the look you’re going for.
In a nutshell, the Dehaze adjustment works by enhancing the overall contrast in your image, with a focus on the mid-tones and shadows. Although it’s primarily meant for cutting through haze, smoke, or fog, it works exceptionally well to improve a washed-out sky.
As for the Clarity adjustment, it works well as a side-kick to Dehaze by bringing out subtle details in the clouds or along the horizon. Using both of these adjustments together can work wonders, just take a look at this example.
Within the Basic panel of the Develop Module, Dehaze and Clarity are located below the primary exposure adjustments.
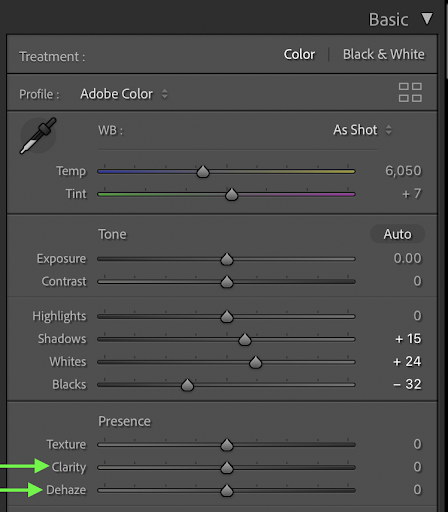
While using these within the Basic Panel, the adjustments will be applied to the entire photo. With some images, this can create a more desirable effect than you might realize.
Starting with the Dehaze slider, moving it right to increase the contrast, continue until your sky begins to improve. After you’re happy with the Dehaze adjustment, move on to the Clarity slider, once again moving it right to increase the clarity.
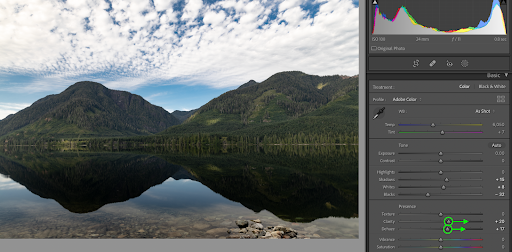
Although it affected the entire image, it helps the whole scene look more dramatic than the original while also enhancing the sky. For moody landscape images, in particular, this creates an awesome look.
Now it’s understandable if you only want these adjustments to take place in the sky, so you can also use these sliders with selective adjustments. By clicking on the Masking Icon, choose between the Linear Gradient, Radial Gradient, Adjustment Brush, or Select Sky for your adjustment.
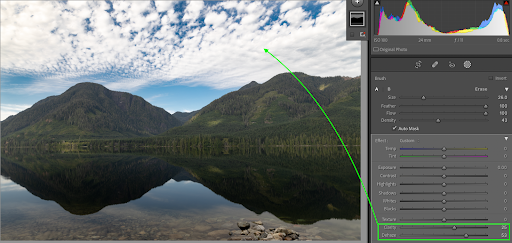
For this example I will use the Adjustment Brush, painting over the sky to tell Lightroom exactly where the adjustments should take place.
Look to the adjustments panel once the mask is created to find the Dehaze and Clarity sliders. Moving these to the right will now enhance the sky without affecting anywhere else in my image.
So whether you want quick and easy results, or want a more refined look with the help of masking, these are a few tricks that will offer impressive results in your skies! These effects look amazing at midday, but also during golden hour. The only problem is that these adjustments only get you so far with sunset or sunrise images. Luckily this 8-step editing process for golden hour photos will help you take your images to new levels!